Welcome to this comprehensive guide on configuring the Interactions Settings for a video on the dadan platform. Whether you’re an educator, trainer, or content creator, this document provides a step-by-step approach to help you navigate the platform’s interface, customize interaction behaviors, and review participant responses effectively.
Steps to access dadan Interactions Settings #
To access and change dadan video Interactions Settings:
- Accessing the Video Library:
- Open the dadan web app; it defaults to the Personal Library section.
- Locate and open the video you want to access.

- Navigating to Interactions management console:
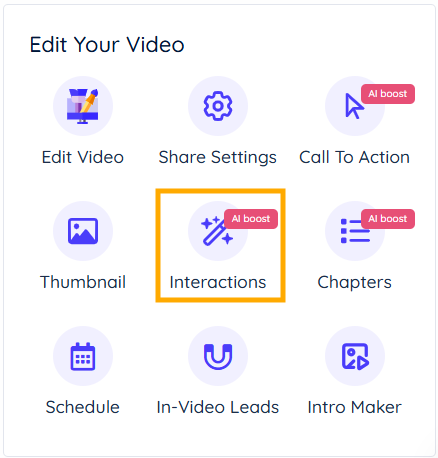
- Find and click the Interactions button to open the Edit Your Video box within the video player interface.

- Open the Interactions management console:
- The console allows you to customize video interaction behavior and review participant responses.

Configuring Interactions Settings #
In the Interactions Management Console on the General Settings tab, set the following options:
- Participant Identification: Select “Require Participants To Provide Info Before Taking The Quiz” or “Let Participants Stay Anonymous” based on your needs.

Note: Names will be collected. To enable the custom field option, toggle the switch to Enabled. Enter the custom field name, e.g., “Student ID,” in the provided text box.

- Prevent Seeking: Disabled by default, allowing viewers to navigate freely through the video unless manually enabled to restrict movement.
- Hide Question Markers on Timeline: Disabled by default, making question markers visible on the timeline unless toggled to hide them for a cleaner viewing experience.
- Allow Participants To Retake Interactions: Disabled by default, limiting participants to a single attempt unless activated to permit multiple retries.
- Schedule Interactions: Disabled by default, providing flexibility in interaction timing unless set to enforce specific start and due dates.

Click Save Settings to apply the changes, or Cancel to discard them.
Reviewing and modifying responses #
To review and add a score to responses:
- Switch to the Responses tab in the Interactions Management Console.
- View the list of participant responses:
- Columns: Name, Email, Submitted, Score, Actions.
- Entries: All participants are listed as (Anonymous) with submission dates.

- Select participants by checking the box next to their name; the empty entry is a 0.00% score.
- Click Modify under the Actions column to open the Modify null Answers window.

- In the Modify null Answers window:
- Enter a Score: e.g., 90 out of 100 in the score box (adjustable via the dropdown).

- Add feedback by clicking + Feedback and entering, e.g., “Excellent!” in the feedback text box.
- Click Save to update the score and feedback, or Cancel to discard changes.

Reviewing updated response data #
To review updated response data:
- Return to the Responses tab and verify all updated scores.
- Note that the updated list reflects the added score.

Reviewing summary data #
To review summary data:
- Navigate to the Summary tab in the Interactions Management Console.
- Review the performance metrics:
- High Score: e.g., 95.00%
- Low Score: e.g., 55.00%
- Median Score: e.g., 80.00%

- Check the question summary: Question: e.g., True or False:
- Question: e.g., “The WebVTT segment provided has a duration of 23 seconds or less.”
- Participants: e.g., 7
- Options: e.g.:
- False: 0% (0 count)
- True: 100% (7 count)
Exporting or deleting responses (optional): #
You can export or delete responses:
- In the Responses tab.
- Select one or multiple participants by checking their boxes.
- Click Delete Selected to remove selected responses, or click Export to download the data.
- Choose an export format from the dropdown: Export as PDF, Export as XLSX, or Export as CSV.


